
Introduction
As cybersecurity consultants, it’s pretty common to come across Android apps that need to be audited. In this short post, I’ll show you a quick and easy way to set up your own lab to make things smoother. I’ll also share some tips on how I usually approach Android app pentesting and what I like to focus on during an assessment.
A bit of theory never hurts, so here we go: First, it’s important to understand that Android applications come in .apk format. This format is a variation of Java’s .jar files and is used to package and distribute components for Android devices. Basically, an APK is just a compressed ZIP file with a different extension, which means it can be opened and inspected using any archive tool — something we’ll look at later on.
This basic understanding of APK structure will come in handy as we start interacting with real applications, modifying their behavior, and inspecting their logic. Before we get to that point, though, we need to make sure our environment is properly configured.
Create environment
To set up our Android pentesting lab, we need to have the following tools installed:
- Genymotion
- Frida
- Burp Suite
- JADX
Each of these tools plays a key role during the assessment process. Genymotion is an Android emulator that allows us to run virtual devices for testing in a controlled environment — it’s fast, flexible, and supports root access. Frida is a powerful dynamic instrumentation toolkit that lets us hook into running processes, modify app behavior on the fly, and bypass security checks like root or SSL pinning. Burp Suite acts as our intercepting proxy, enabling us to analyze and manipulate HTTP/HTTPS traffic between the app and backend services. Finally, JADX is a decompiler that allows us to convert APKs into readable Java code, making it easier to understand the app’s logic and look for hardcoded secrets, insecure API usage, or potential vulnerabilities
First of all, we’re going to create two virtual devices in Genymotion — one running Android 11 and another running Android 13.0 (which is currently the highest version available in Genymotion). The reason for this setup is that, due to a recent update, Genymotion only provides root access up to Android 11. For versions above that, root access is no longer available.

Personally, I use the Android 11 device most of the time, since it allows me to hook and test apps freely. However, when I come across an app with strong anti-root protections that I can’t bypass easily, I switch to the Android 13.0 device to continue the analysis without root interference.
Let’s start by booting up the Android 11 virtual device and opening Burp Suite. Using the following commands, we’ll extract the Burp certificate, install it on the device, and route all traffic through the proxy.
Make sure the Burp proxy listener is configured to bind to all interfaces (*).
$ curl localhost:8080/cert -o cert.der
$ openssl x509 -inform der -in cert.der -out cert.pem
$ openssl x509 -inform PEM -subject_hash_old -in certificado.pem | head -1
$ mv cert.pem 9a5ba575.0
$ adb shell
vbox86p:/ # su
1|:/ # mount -o remount,rw /
:/ # exit
vbox86p:/ # exit
$ adb push 9a5ba575.0 /system/etc/security/cacerts/
In this step, we gain root access to the Android emulator using adb shell and su, then remount the root filesystem with read/write permissions (mount -o remount,rw /) to allow modifications. After that, we use adb push to copy the Burp Suite certificate (9a5ba575.0) into the system’s trusted CA store located at /system/etc/security/cacerts/, enabling the device to trust our proxy and properly intercept HTTPS traffic.
Now we need to set up the proxy on the Android device. To do that, we first need to get our local IP address — you can use ifconfig or ip a for that. Once you have your local IP, run the following command to configure the proxy on the emulator:
$ adb shell settings put global http_proxy 192.168.1.82:8080
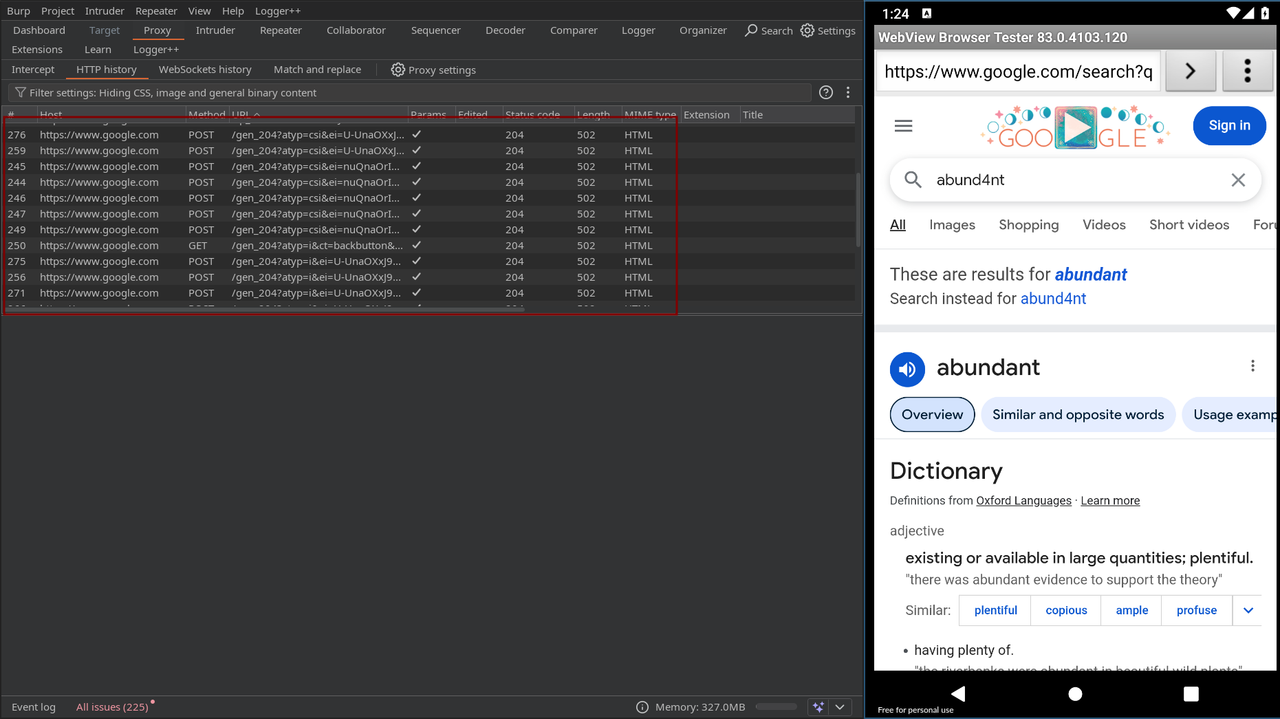
This tells the Android system to route all HTTP and HTTPS traffic through the specified proxy — in this case, Burp Suite running on port 8080 of your local machine. Now, if you open a browser on the device and search for anything on Google, you should see the traffic being intercepted in Burp Suite.
Set Frida
If we’re going to audit an app that doesn’t implement SSL pinning or root detection, we can start right away with the setup we just configured. All we need to do is install the app and start analyzing the network traffic.
But things won’t always be smooth — more often than not, we’ll run into apps with protection mechanisms like SSL pinning, root detection, and more. That’s where Frida comes in.
Frida is a dynamic instrumentation toolkit that lets us inject JavaScript into running processes, giving us the ability to bypass or modify app behavior at runtime. With Frida, we can hook into specific functions, disable root checks, bypass SSL pinning, monitor internal function calls, and even modify return values — all without needing to recompile the APK. It’s one of the most powerful tools in mobile app pentesting, especially when dealing with hardened apps.
If you’re not familiar with the concepts of SSL pinning and root detection, I recommend checking out these two articles: 1, 2
To use Frida on the Android device, we need to install frida-server on the emulator or physical device. This binary must match the architecture of the Android system (usually x86 for Genymotion or arm64 for real devices). Once downloaded, we push it to the device and run it in the background with the following commands:
$ adb push frida-server /data/local/tmp/
$ adb shell "chmod +x '/data/local/tmp/frida-server'"
$ adb shell "su -c '/data/local/tmp/frida-server &'"
This sets the correct permissions and runs Frida with root privileges in the background, allowing us to start injecting scripts into apps from our host machine using the Frida CLI or Python bindings.
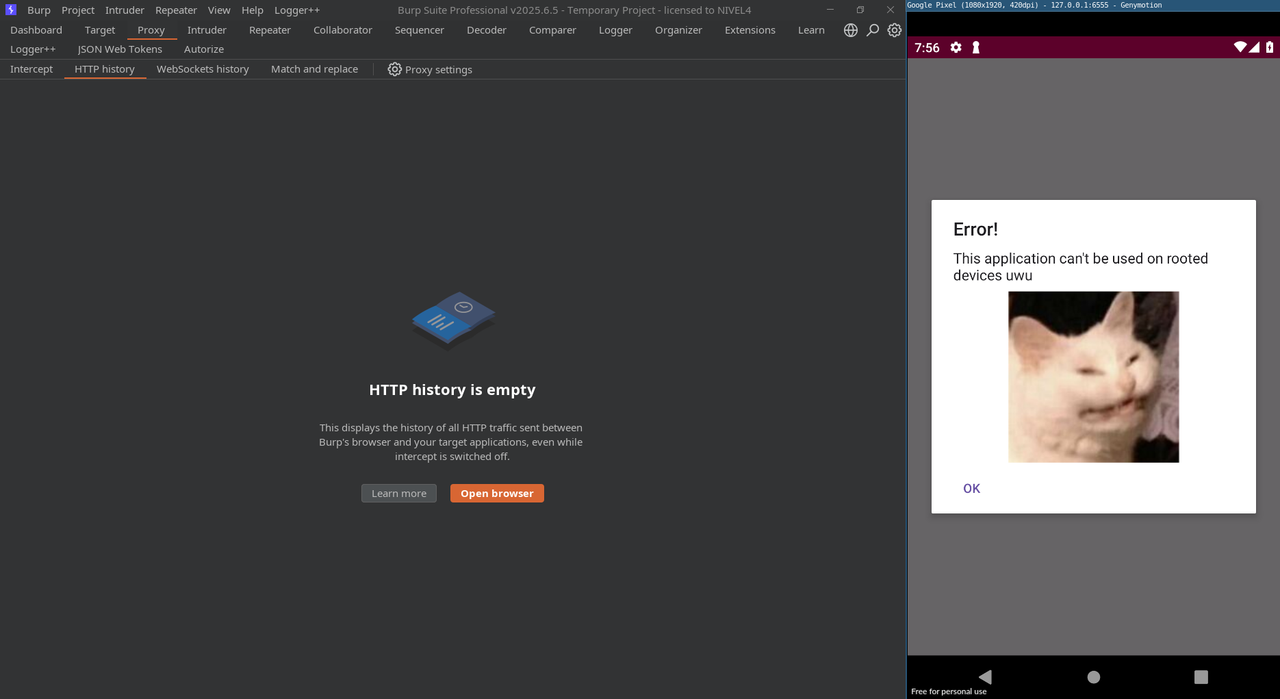
Once Frida is up and running on the phone, we can start using it to hook and modify the behavior of applications in real time. As an example, we’ll bypass the root detection protection of an app called fridaen45minutos. This application was created by some colleagues specifically for a talk, and it includes basic checks to prevent execution on rooted devices. You can download it here.
If we install the app on our phone and try to launch it, we’ll quickly notice that it doesn’t allow us to proceed — that’s because the device is rooted. The app detects the root status and immediately blocks access as a security measure. This behavior is exactly what we’ll be targeting and bypassing with Frida.
Evasion of anti-root control
Now we’re going to use a Frida script designed to bypass the root detection mechanisms implemented in the application. Once we hook into the app’s process and inject the script, Frida will override the methods responsible for performing root checks at runtime, effectively disabling the protection. This allows us to run and interact with the application on a rooted device without being blocked.
The script is included in the repository of the frida-en-45-minutos application, so you can find it there and use it directly:
if(Java.available){
    Java.perform(function(){
        console.log("");

        const rootCheckerClass = Java.use("com.nivel4.RootChecker.rootChecker");

        rootCheckerClass.checkSu.implementation = function() {
            console.log("checkSu returned", this.checkSu());
            return false;
        }

        rootCheckerClass.testKeys.implementation = function() {
            console.log("testKeys returned", this.testKeys());
            return false;
        }

        rootCheckerClass.checkPackages.implementation = function() {
            console.log("checkPackages returned", this.checkPackages());
            return false;
        }
    })
}
To find the app’s identifier (package name), we can run the following command:
$ frida-ps -Uai
 PID  Name                  Identifier
----  --------------------  --------------------------------
6429  Files                 com.android.documentsui
6366  Google Play Store     com.android.vending
3556  Phone                 com.android.dialer
7039  fridaen45minutos      com.nivel4.fridaen45minutos
   -  Amaze                 com.amaze.filemanager
   -  Aptoide               cm.aptoide.pt
   -  Calendar              com.android.calendar
   -  Camera                com.android.camera2
   -  Clock                 com.android.deskclock
   -  Contacts              com.android.contacts
   -  Custom Locale         com.android.customlocale2
   -  Dev Tools             com.android.development
   -  Development Settings  com.android.development_settings
   -  Gallery               com.android.gallery3d
   -  JokesPhone            com.cashitapp.app.jokesphone
   -  Messaging             com.android.messaging
   -  Neatpagos             com.neat.mobileappprod
   -  Search                com.android.quicksearchbox
   -  Settings              com.android.settings
   -  Superuser             com.genymotion.superuser
   -  WebView Shell         org.chromium.webview_shell
Once we have the correct identifier (in this case, com.nivel4.fridaen45minutos), we can load the script into the running app by executing:
$ frida -U -f com.nivel4.fridaen45minutos -l antiroot.js
     ____
    / _  |   Frida 16.5.2 - A world-class dynamic instrumentation toolkit
   | (_| |
    > _  |   Commands:
   /_/ |_|       help      -> Displays the help system
   . . . .       object?   -> Display information about 'object'
   . . . .       exit/quit -> Exit
   . . . .
   . . . .   More info at https://frida.re/docs/home/
   . . . .
   . . . .   Connected to Pixel (id=127.0.0.1:6555)
Spawned `com.nivel4.fridaen45minutos`. Resuming main thread!
[Pixel::com.nivel4.fridaen45minutos ]->
checkSu returned true
checkPackages returned true
testKeys returned true
This will inject the script and hook the necessary functions to disable the app’s root detection. After that, if we launch the app on a rooted device, it will no longer block access. This confirms that the anti-root bypass was successful, allowing us to interact with the application freely despite the device being rooted.
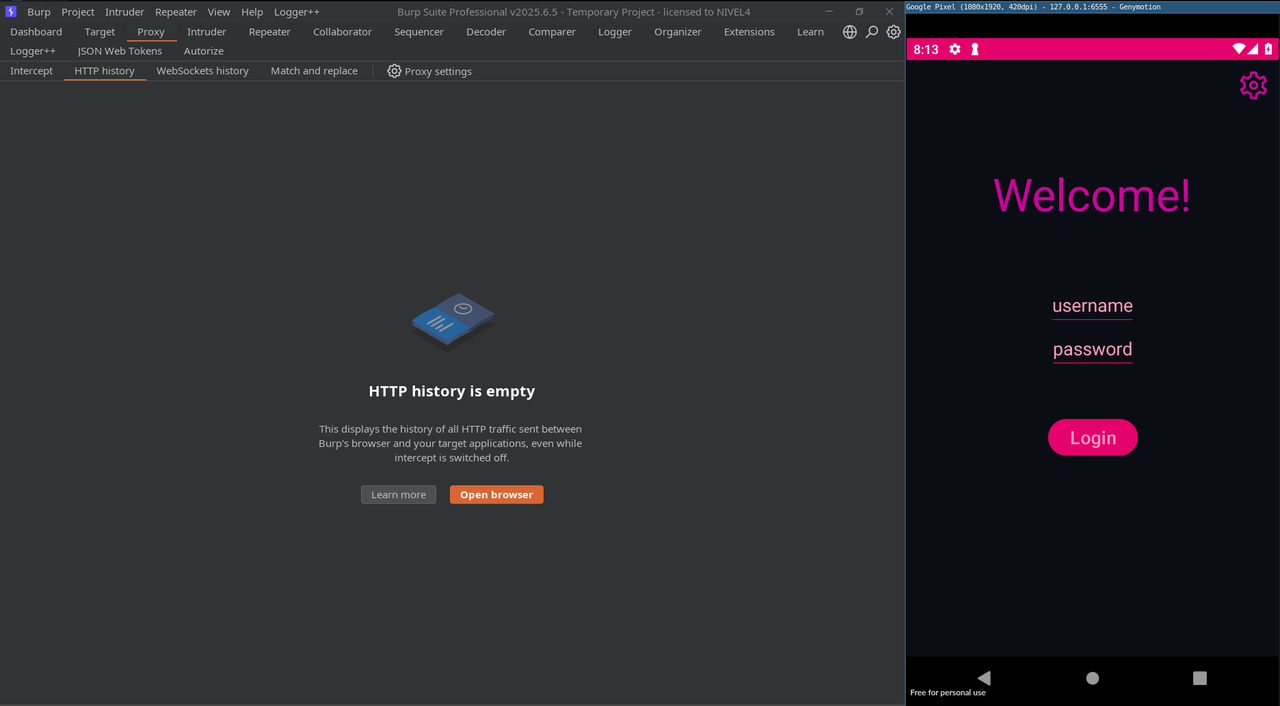
In the previous example, we saw how Frida combined with a custom script can effectively bypass the root detection mechanisms of an application. This approach allows security testers to analyze and interact with apps that would otherwise refuse to run on rooted devices, opening the door to deeper inspection and testing.
Reverse Engineering
If we need to perform reverse engineering on the APK, one of the most useful tools is Jadx. After installing it, you’ll find a binary called jadx-gui, which launches the graphical interface of the tool — making it easier to explore the app’s internals visually.
To get started, simply open jadx-gui, click on “File” > “Open”, and select the APK you want to analyze. Jadx will automatically decompile the DEX (Dalvik Executable) files inside the APK and present you with a Java-like source code view. You’ll be able to browse through the app’s package structure, classes, methods, and resources like AndroidManifest.xml, layouts, and strings.

This is extremely useful for understanding how the app works under the hood, identifying potential attack surfaces (such as hardcoded API keys, exposed components, insecure logic), and mapping out where you might want to hook or patch with tools like Frida.
While Jadx doesn’t produce 100% accurate Java code (since it’s decompiled from bytecode), it’s more than enough for static analysis and planning dynamic testing.
In summary: We went through how to set up an environment for mobile app testing, how to configure a proxy to intercept traffic, and how to use Frida to bypass common protections when needed.
Now, I’d like to share some personal tips based on my experience — things that help me perform effective analysis and find interesting vulnerabilities in a short amount of time (because let’s be honest, we rarely have unlimited time during an audit).
Tips
The first thing I usually do is open the APK in jadx-gui and look for any exposed or leaked information — such as hardcoded API keys, credentials, internal endpoints, or file paths. Once I get a general idea of the app’s structure, I install the APK on an emulator and check if it implements security protections like SSL Pinning or Root Detection.
If the app has no protections in place — lucky day! — I jump straight into the ethical hacking phase. But if those protections are present, I try to bypass them using Frida scripts. If the scripts don’t work, then it’s time to go manual — which is great for learning. If you’re interested in learning how to do it manually, I highly recommend this talk (given by some good friends of mine — absolute pros, by the way).
Once the protections are bypassed, I treat the mobile app just like I would a web application. Most mobile apps interact with backend APIs, especially when there’s a login mechanism involved, so the approach becomes very similar to classic API pentesting.
In general, I focus heavily on business logic flaws, injection points, and poor client-side control of iterations, parameters, or flows. I also use multiple mobile testing checklists and guides to make sure I cover as much ground as possible and get the highest value findings in the time I have.